django アーカイブ
2012年09月26日
2012年09月27日
Djangoで静的ファイルを配信する場合のセッティング
本番運用では静的ファイルはapache等で配信するべきだが、開発段階で静的ファイルを配信したい場合はこうします.
if settings.DEBUG:
urlpatterns += patterns('',
url(r'media/(?P.*)$', 'django.views.static.serve',
{'document_root': settings.MEDIA_ROOT}),
)
2012年10月01日
[django] 期限切れのセッションにアクセスすると
saveした時点でセッションが増えます.
期限切れのセッションは、定期的に削除するようにしましょう.
2012年10月03日
[django] Paginator
Paginatorの確認
def test001(request):
'''ページネーターの動作確認'''
objects = ['john', 'paul', 'george', 'ringo']
p = Paginator(objects, 2)
try:
page1 = p.page(3)
except EmptyPage, e:
print e
page1 = p.page(1)
c = dict(
has_next=page1.has_next(),
has_previous=page1.has_previous(),
has_other_pages=page1.has_other_pages(),
next_page_number=page1.next_page_number(),
previous_page_number=page1.previous_page_number(),
start_index=page1.start_index(),
end_index=page1.end_index(),
object_list=page1.object_list,
number=page1.number,
test=None,
)
c = simplejson.dumps(c, sort_keys=True, indent=2 * ' ')
return HttpResponse(c, mimetype='application/json')
すべてのページをjsonにする
def test002(request):
'''ページネーターの動作確認'''
objects = ['john', 'paul', 'george', 'ringo', 'yyy']
p = Paginator(objects, 2)
pageRange = p.page_range
cc = {}
for ipage in pageRange:
page1 = p.page(ipage)
c = dict(
has_next=page1.has_next(),
has_previous=page1.has_previous(),
has_other_pages=page1.has_other_pages(),
next_page_number=page1.next_page_number(),
previous_page_number=page1.previous_page_number(),
start_index=page1.start_index(),
end_index=page1.end_index(),
object_list=page1.object_list,
number=page1.number,
test=None,
)
cc[ipage] = c
ccJson = simplejson.dumps(cc, sort_keys=True, indent=2 * ' ')
return HttpResponse(ccJson, mimetype='application/json')
2012年10月11日
django1.3の汎用ビュー(クラス編)
Making "friendly" template contexts
デフォルトでは「object_list」にアサインされるんだけど、それがふさわしくない場合は、変更できます.urlpatterns = patterns('', (r'^publishers/$', ListView.as_view( model=Publisher, context_object_name="publisher_list", )), )
Adding extra context
Often you simply need to present some extra information beyond that provided by the generic view. For example, think of showing a list of all the books on each publisher detail page. The DetailView generic view provides the publisher to the context, but it seems there's no way to get additional information in that template. 普通はデフォルトの汎用ビューを使ったらそれ以外の情報は見れないよね?However, there is; you can subclass DetailView and provide your own implementation of the get_context_data method. The default implementation of this that comes with DetailView simply adds in the object being displayed to the template, but you can override it to show more:
でもDetailViewをサブクラス化して、「get_context_data」メソッドをオーバーライドすれば可能だよ.
from django.views.generic import DetailView
from books.models import Publisher, Bookclass PublisherDetailView(DetailView):
context_object_name = "publisher"
model = Publisherdef get_context_data(self, **kwargs):
# Call the base implementation first to get a context
context = super(PublisherDetailView, self).get_context_data(**kwargs)
# Add in a QuerySet of all the books
context['book_list'] = Book.objects.all()
return context
ああ、管理人がやりたかったのはまさにこれだ!
2012年10月12日
django1.3の汎用ビュー(クラス編) - Generic views of objects
modelsに基づく汎用ビュー
以下のモデルを考える
# models.py
from django.db import modelsclass Publisher(models.Model):
name = models.CharField(max_length=30)
address = models.CharField(max_length=50)
city = models.CharField(max_length=60)
state_province = models.CharField(max_length=30)
country = models.CharField(max_length=50)
website = models.URLField()class Meta:
ordering = ["-name"]def __unicode__(self):
return self.nameclass Book(models.Model):
title = models.CharField(max_length=100)
authors = models.ManyToManyField('Author')
publisher = models.ForeignKey(Publisher)
publication_date = models.DateField()
Publisherの全ての行を表示するには
from django.conf.urls.defaults import *
from django.views.generic import ListView
from books.models import Publisherurlpatterns = patterns('',
(r'^publishers/$', ListView.as_view(
model=Publisher,
)),
)
テンプレートを書く
/path/to/project/books/templates/books/publisher_list.html
{% extends "base.html" %}{% block content %}
Publishers
{% for publisher in object_list %}
- {{ publisher.name }}
{% endfor %}
{% endblock %}
django1.3の汎用ビュー(クラス編) - Simple usage
Class-based generic views (and any class-based views that inherit from the base classes Django provides) can be configured in two ways: subclassing, or passing in arguments directly in the URLconf.
クラスベースの汎用ビューは2つの方法で設定できる.サブクラス化するか、またはURLconfの中で直接引数を渡すか、である.
TemplateViewをサブクラス化する
# some_app/views.py
from django.views.generic import TemplateViewclass AboutView(TemplateView):
template_name = "about.html"
URLconfに新しいビューを追加する
# urls.py
from django.conf.urls.defaults import *
from some_app.views import AboutViewurlpatterns = patterns('',
(r'^about/', AboutView.as_view()),
)
または・・・
from django.conf.urls.defaults import *
from django.views.generic import TemplateViewurlpatterns = patterns('',
(r'^about/', TemplateView.as_view(template_name="about.html")),
)
2012年10月14日
django1.3の汎用ビュー - Extending generic views
1.3では汎用ビューがクラスになったそうで.今までは関数で実装されていたのは削除されたらしい.これでどういう便利さをもたらしたのかを検証してみたい.(続きはそのうち・・・)
Extending generic views
There's no question that using generic views can speed up development substantially. In most projects, however, there comes a moment when the generic views no longer suffice. Indeed, the most common question asked by new Django developers is how to make generic views handle a wider array of situations.
汎用ビューが開発を安定的にスピードアップしてくれるということに関して疑問の余地はないだろう.しかしながら多くのプロジェクトではこの汎用ビューが充分ではないこともあるだろう.実際には多くの共通する質問が、広い範囲のシチュエーションに対していかに汎用ビューを対応させるかということである.
This is one of the reasons generic views were redesigned for the 1.3 release - previously, they were just view functions with a bewildering array of options; now, rather than passing in a large amount of configuration in the URLconf, the recommended way to extend generic views is to subclass them, and override their attributes or methods.
汎用ビューは1.3リリースで再実装された.以前はなにがなんだか訳がわからないオプションのビュー関数のみであったのだが.今はむしろ多くの設定をURLconfに書いて渡せるし、汎用ビューを拡張する良い方法が、それらをサブクラス化し属性またはメソッドをオーバーライドすることである.(適当訳)
2012年10月23日
Djangoをapache+mod_wsgiで動かす
まずはPythonをインストールしましょう.Djangoは、Pythonのバージョン2.5~2.7に対応しています.この時、sqlite3もビルド出来ているか確認します.zlibもyumで前もってインストールしておきましょう.
出来ていない場合は「./configure LDFLAGS='-L/path/to/lib' CPPFLAGS="-I/path/to/include'」あたりを考えてみましょう.(参考:「Building python 2.6 w/ sqlite3 module if sqlite is installed in non-standard location」「2.7.3: sqlite module does not build on centos 5 and Mac OS X 10.4」.結局「」を修正するはめに)
./configure --prefix='/opt/python2.7.3' LDFLAGS='-L/usr/lib' CPPFLAGS="-I/usr/include" CFLAGS="-I/usr/include"
また、Django起動時にhashlib関連のエラーが頻発しますので、hashlibをインストールしておきます(上記configureで出なくなります).
--enable-sharedも必要です.
次にDjangoをインストールします.ダウンロードしてきてインストールしたPythonでsetup.pyします.hashlibをインストールするときもこのようにインストールしたいPythonのバージョンで「setup.py」してください.
/opt/python2.7.3/bin/python2.7 setup.py build
(suして)/opt/python2.7.3/bin/python2.7 setup.py install
インストールできたらDjangoがimportできるか試してみます.
import django
プロジェクトを作成します.
/opt/python2.7.3/bin/python2.7 /opt/python2.7.3/lib/python2.7/site-packages/django/bin/django-admin.py startproject mysite1_4
パスを通すのがめんどくさいのでdjango-adminを絶対パスで指定します.
この後のアプリケーションの作成とかはこの「mysite1_4」フォルダの中に作成された「manage.py」でできますので、めんどくさいのはここだけです.
ここでエラーが無くプロジェクトが作成されたら、Djangoのインストールは成功しているといってよいと思います.
後でこの「mysite1_4」はrootにオーナーを変更するか、/var/wwwあたりにコピーしてそちらで運用することになりますが、今はここでよいでしょう.
Djangoを起動してみましょう.「cd mysite1_4」して「mysite1_4」ディレクトリに入ります.
/opt/python2.7.3/bin/python2.7 manage.py runserver (このマシンのホスト名):8000
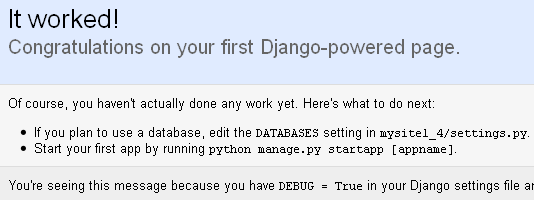
ブラウザで「http://(このマシンのホスト名):8000/」または「http://(IPアドレス):8000/」で以下のような表示になれば成功です.

Djangoの稼動確認が終わったところで、mod_wsgiをインストールします.apacheもインストールしておいてください.apacheのdevelもインストールしましょう.インストールしておかないとなにやらapxsが無いとか怒られますし.
mod_wsgiのソースをダウンロード・解凍します.以下のようにしてmod_wsgiをインストールします.
./configure --with-python=/opt/python2.7.3/bin/python2.7
make
(suして)make install
筆者は先の「mysite1_4」ディレクトリを「/var/www/Django14」配下にコピー、オーナーをrootに変更しました.adminのままだとapache+mod_wsgiで動かしたときに「権限がない」と言われますので.
以下のように「/etc/httpd/conf/httpd.conf」を設定します.
LoadModule wsgi_module modules/mod_wsgi.so
Alias /static/ /var/www/Django14/static/
<Directory /var/www/Django14/static>
Order deny,allow
Allow from all
</Directory>WSGIDaemonProcess example.com python-path=/var/www/Django14 processes=5 threads=1
WSGIScriptAlias / /var/www/Django14/mysite1_4/wsgi.py
WSGIPythonPath /var/www/Django14<Directory /var/www/Django14/mysite1_4>
<Files wsgi.py>
Order deny,allow
Allow from all
</Files>
</Directory>
また、mysite配下にwsgi.pyを作成します. IntegrationWithDjango - modwsgi
import os, sys
sys.path.append('/usr/local/django')
os.environ['DJANGO_SETTINGS_MODULE'] = 'mysite.settings'import django.core.handlers.wsgi
application = django.core.handlers.wsgi.WSGIHandler()
apacheを再起動して、「http://(このマシンのホスト名)/」または「http://(IPアドレス)/」で、上と同じ表示になれば成功です.
追記:
Djangoのsettings.pyのtimezone設定を「Asia/Tokyo」にしないとapacheのaccess.logの時間も日本時間になりません.
追記2:
staticは以下のような感じでシンボリックリンクを
ln -s /opt/python2.7.3/lib/python2.7/site-packages/django/contrib/admin/static/admin admin